A Journey to the Firmware of ZTE H267A: Part II
In the previous post, I explained how I’ve got the proof that leads me to get the root password and the firmware of the ZTE H267A router. In this part of the series, I will explain the techniques I used and how I configured the environment. But before explaining the successful approach, I want to mention about failed ones briefly.
The Failures
At first, I tried the golang code here. Unfortunately, it didn’t work well. I saw lots of malformed, retransmitting, or dropped packets, and the router couldn’t connect to the configuration server.
As a second solution, I tried iptables to forward packets going through the bridged network.
This way, I could be able to modify the response, but none of the packets forwarded to the proxy server.
I thought, how come iptables interact with a network interface without an IP assigned.
With that thought in mind, I assigned an IP address to the bridge interface, but this time, the router lost its connection to the internet.
I don’t have enough knowledge in this area, and my assumption might be wrong. But what I was sure is I needed to find another way to alter the response returning from the configuration server.
Successful Technique
After all of these failures, I wanted to mimic both the router and the ISP. So in this way, I could bind those mimicked connections on another network interface, and finally, I could use iptables in this scenario.
If you create a bridge connection like I did in previous post, you need to remove it first.
|
|
Configuring the PPPoE Server
If we configure the PPPoE server, we can deceive the router to connect to our machine, instead of ISP.
I installed ppp and required packages by running the below commands.
|
|
The configuration of pppoe-server utility took me a while to understand. I tried with different configurations, watched the logs, fixed the problems, and eventually, I built the correct configuration.
/etc/ppp/allip
|
|
/etc/ppp/pppoe-server-options
|
|
/etc/ppp/pap-secrets
|
|
One of the interesting things about pppoe-server is that it requires you to create a user on Ubuntu for each user you added in the pap-secrets file.
Based on that information, I created fiber@fiber and YOUR_USERNAME_HERE users by running following command.
|
|
Before going forward, I wanted to test if the router can connect to the PPPoE server.
I run the command below to start the server, and to verify it, I opened the web interface of the router and checked if it has an IP like 10.0.0.X
|
|
Configuring the PPPoE Client Connection
To connect with the ISP over PPPoE, I used the built-in pppoe tool.
So, after connecting the ethernet cable coming from the ISP, I executed pppoeconf first and followed the instructions.
After configuration is done, I run pon dsl-provider to actually start the connection between my machine and the ISP.
And to check if I really connected to the internet, I executed ping.
|
|
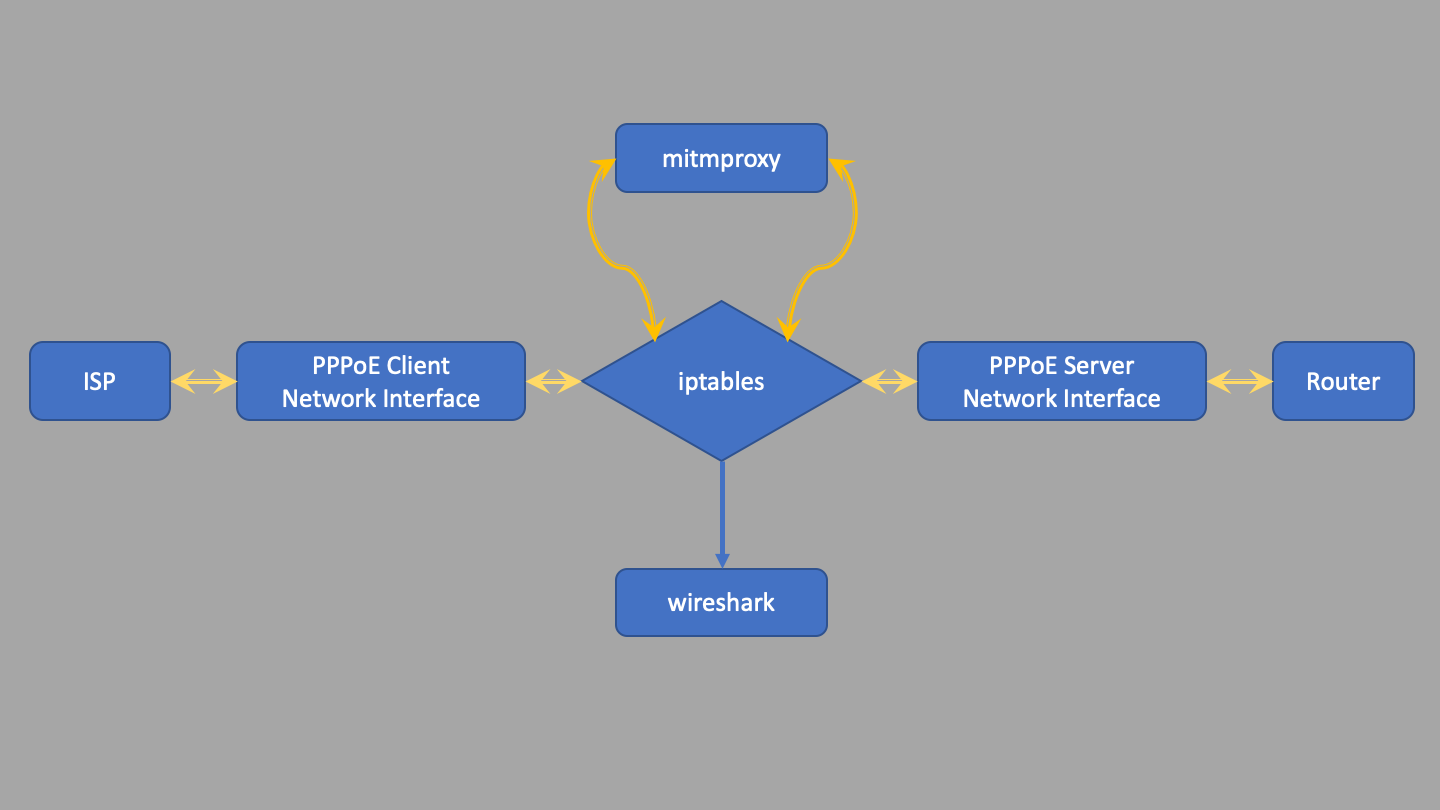
Connecting PPPoE Client and Server
To bridge the connections using iptables, I needed to find out which interface is created by pppoe client.
To see the name of the interface, I checked by running ifconfig, and I saw that there were 2 connections like ppp.
One of them was the PPPoE Server named ppp0 and the other for PPPoE Client named ppp1.
So, to be able to connect my router to internet, I needed iptables to forward all packets through ppp1 interface, and I executed the following commands.
|
|